A no-code walkthrough from messy text to a verifiable Maltego graph — and the one prompt choice that decides whether you can trust the output.

You’re staring at a 200-page court document, a leaked chat export, or an interview transcript. You need a relationship graph for analysis. You don’t write Python, you don’t have time to set up custom transforms, and you don’t trust an AI to just “figure it out.”
This is how to do it in Google AI Studio and more importantly, how to write the prompt so you can actually defend the output in front of an editor.
The Dataset: Why Friends?
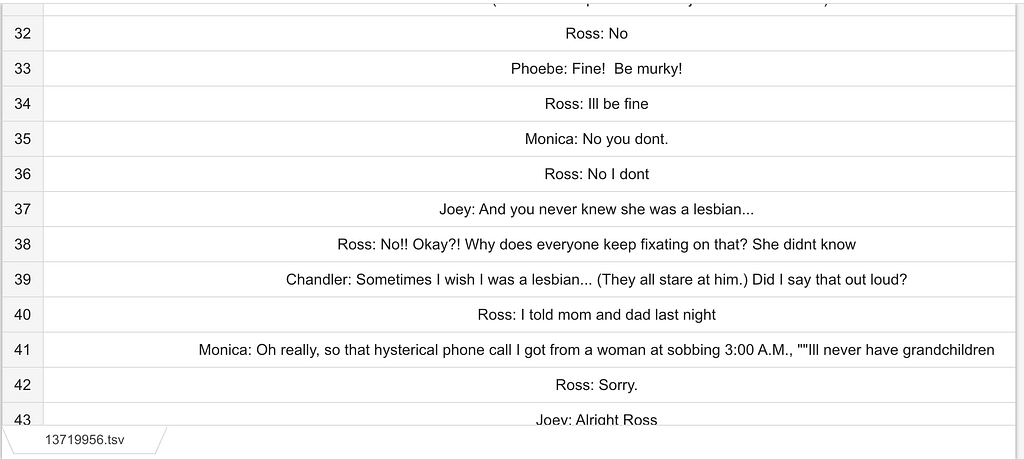
I was inspired by Tom Jarvis and chose the Friends pilot episode script as the test dataset deliberately.
First, everyone knows it, so you can intuitively verify whether the AI got the relationships right without being a domain expert. Second, it’s rich with named entities: people, places, objects, explicit and implied relationships. Third, it has exactly the kind of messy, natural language that makes real-world OSINT sources hard to process.
If the workflow works on Friends, it works on a court document, a leaked chat log, or a news transcript. The dataset is the proof of concept, not the point.
If you want to try and follow along, get the data right here.
Step 1: Setting Up Google AI Studio
Go to aistudio.google.com and log in with your Google account. You get a generous free tier, no setup, no API key, just start experimenting.
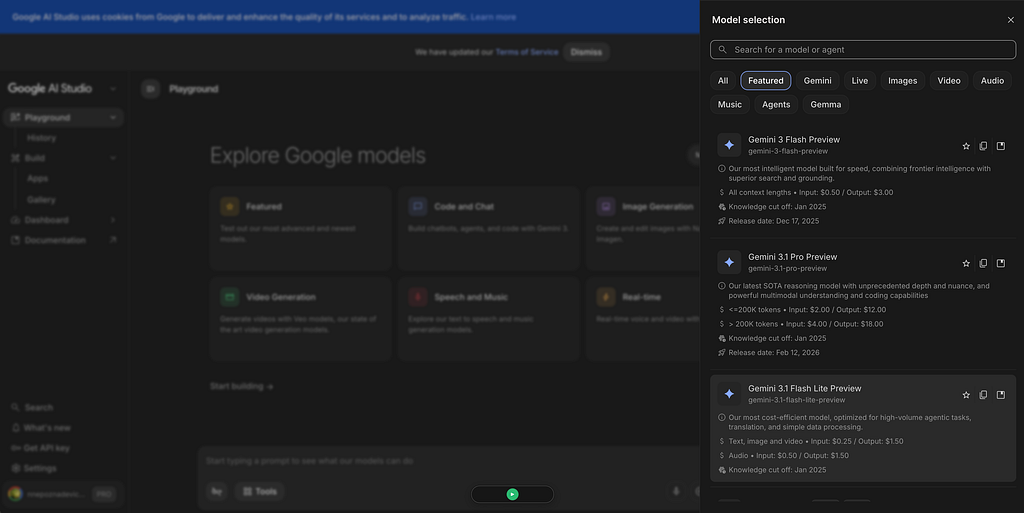
In the top right corner, you’ll see the model selector. The default is currently Gemini 3.1 Pro Preview, which is the most capable option but also the most expensive. Even if we don’t go beyond the free tier, it will swallow a lot more tokens than a cheaper model.
We will use Gemini 3.1 Flash Lite Preview, which is excellent for these kinds of tasks.
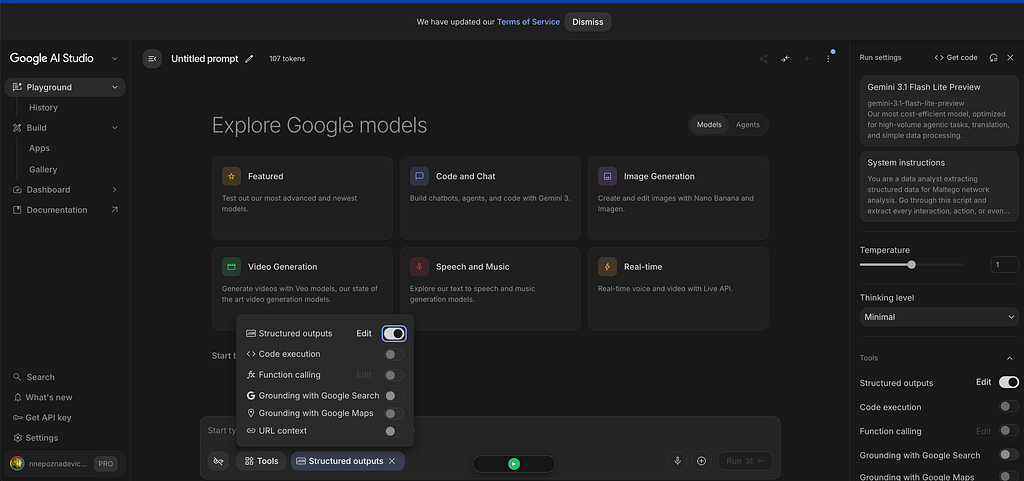
Next, set up your system instructions. This is your system prompt, so the llm understands WHO it is and WHAT to do. You’ll find these just below the model selector. Click on it, create a new instruction, and give it a name. I named mine “Maltego” since that’s what I use it for. Named system prompts can be reused.
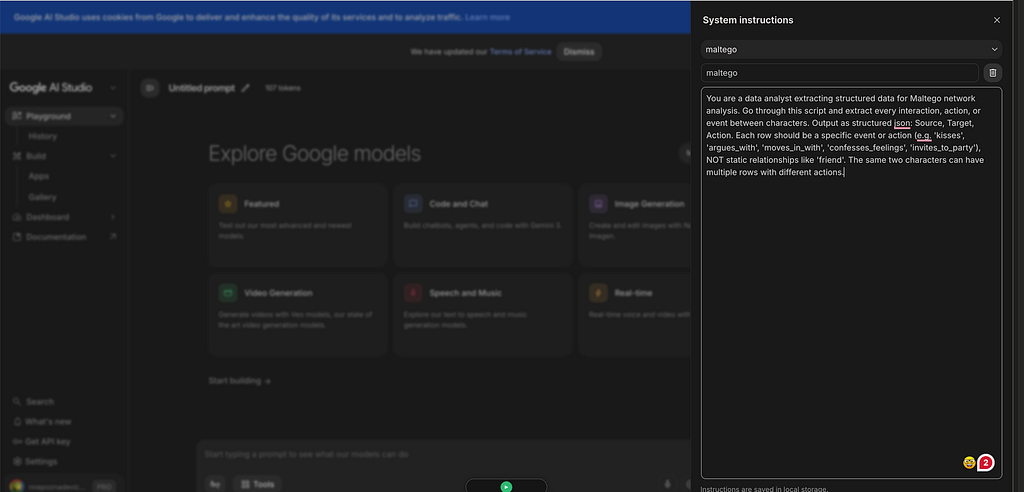
Here’s the prompt I used:
You are a data analyst extracting structured data for Maltego network analysis. Go through this script and extract every interaction, action, or event between characters. Output as structured JSON: Source, Target, Action. Each row should be a specific event or action (e.g. ‘kisses’, ‘argues_with’, ‘moves_in_with’, ‘confesses_feelings’, ‘invites_to_party’), NOT static relationships like ‘friend’. The same two characters can have multiple rows with different actions.
The prompt is deliberately bare. A real job would scope entity types, constrain the action vocabulary, handle pronouns and nicknames, and extract verbatim evidence for validation. If you want the how to of production version, comment ‘data modeling’ below.
Now notice what the prompt is doing: it defines the relationship field as an interaction, action, or event, not a static label. That’s a deliberate choice, and it connects directly to how much you’re asking of the model.
Think of it as a spectrum of interpretive demand. On one end, you ask for action-based relationships: “kisses,” “argues_with,” “shows_up_at_door.” The model doesn’t need to infer anything(almost). It just observes what happens in the text and reports it. Low demand, high consistency.

On the other end, you ask for semantic relationships: “they are friends,” “she trusts him,” “rivals.” Now you’re asking the model to apply context, draw on prior knowledge, and make an interpretive judgment. That’s a much heavier ask, and the output becomes less reliable and harder to verify.
For investigative work, this matters. The closer your relationship definition stays to observable actions in the text, the more you can trust the output. The moment you start asking the model to interpret meaning, you’re introducing its assumptions into your analysis and those assumptions are invisible.
So before you write your schema, ask yourself: am I asking the model to observe, or to interpret? Both are valid, but you should make that choice consciously, understand the consequences by observing it in the explorative part of the data analysis and then reflect it in your prompt and datamodel.
Step 2: Demanding structured output
Structured output is king in data analysis. Instead of free-form text, the model returns data in a schema you define: JSON with specific fields, types, and relationships, ready for analysis. No commentary, no “here’s what I found”: just the data.
Google AI Studio has this built in, and it works very well. You define the schema, feed in raw text, and get back clean JSON. And don’t be alarmed by the file type JSON. This is nothing you have to work with, but this is an excellent file for further data processing.
So lets enable structured output. Go to Tools and switch on Structured outputs. This forces the model to respect your schema, not just approximate it.
Step 3: Validating The Output
Now upload the Friends script or whatever document you are playing with. Click the plus icon or drag and drop your file, and hit run. No need to add a message as the system instructions tell the model what to do.

The output comes back clean: no explanation, no summary, no “I hope this helps.” We now have beautiful structured data 🤤

Before you move on, run it a few times and compare the results. In my experience, giving these models a large document and expecting perfectly consistent output every time is optimistic at best.
The right approach is to start with a few pages, test the reliability, validate your data model, adjust it, and then build a more robust processing pipeline for larger analyses. I will cover this in a separate article if there is interest. Just comment “larger dataset” below.
One useful thing AI Studio shows you is token count and cost estimate. You can see exactly how many input and output tokens were used, and what it would cost at scale. For this exercise, it’s free. But if you’re processing hundreds of documents, you can run one and do the math before committing.

Once you’re happy with the output, convert the JSON to a CSV. The easiest way is to paste it into any LLM and ask it to convert it. Then move to Maltego.
Step 4: Importing Into Maltego
Maltego doesn’t have a native JSON import button, but there are two ways to bring this data in.
Option A: Import CSV directly
Maltego’s built-in import tool accepts a CSV with source, target, and relationship columns. Go to Import > Import Graph from Table, select your file, and Maltego will create entities and draw edges automatically.
Option B: Build a Python transform
If you’re processing a lot of documents and want the whole flow to run from inside Maltego, you can wrap the AI Studio API call in a simple Python transform. That’s out of scope here, but it’s the logical next step if this becomes a regular workflow.
For this walkthrough, we’re going with option A.
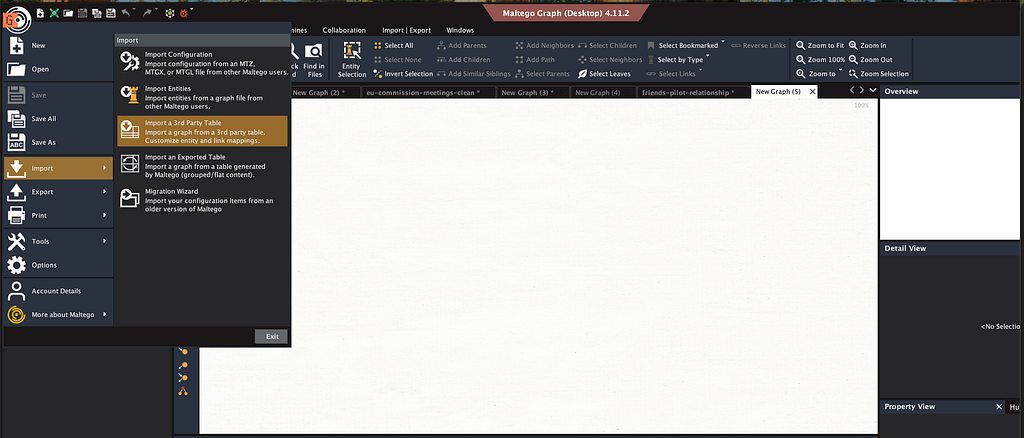
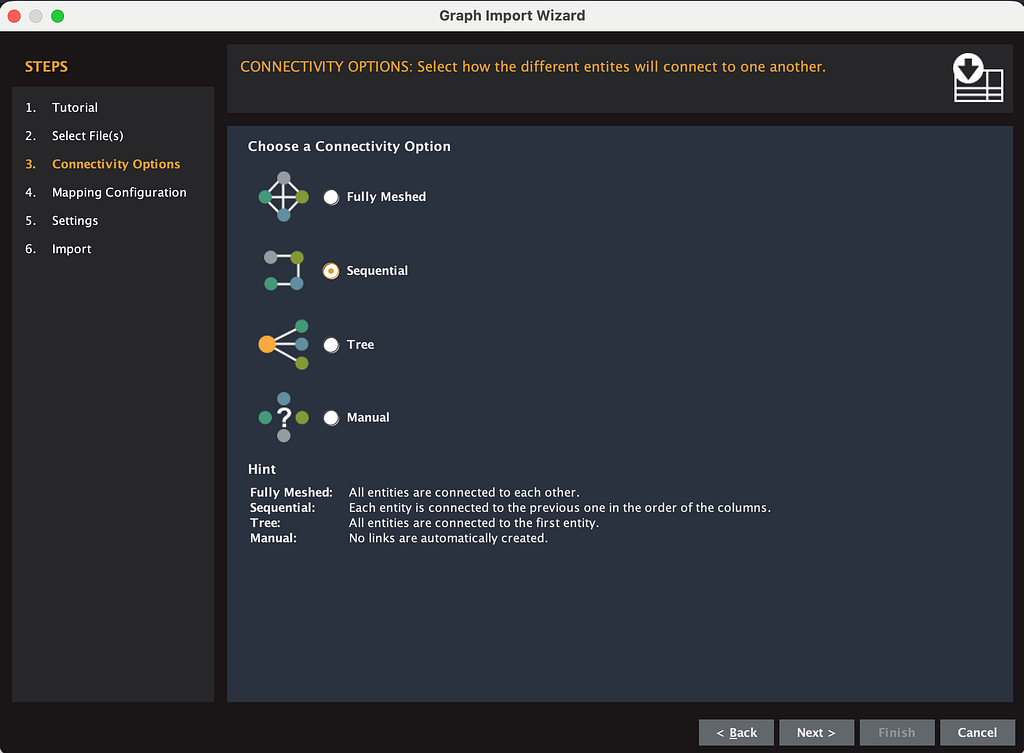
In the import dialog, choose “Import a third-party table” and select your CSV. Then choose the sequential connectivity option.
Maltego will try to auto-map your columns and it will probably get it wrong. Unmap everything first, then map manually.

Now set column 1 as Person (your source), column 2 as Person (your target).
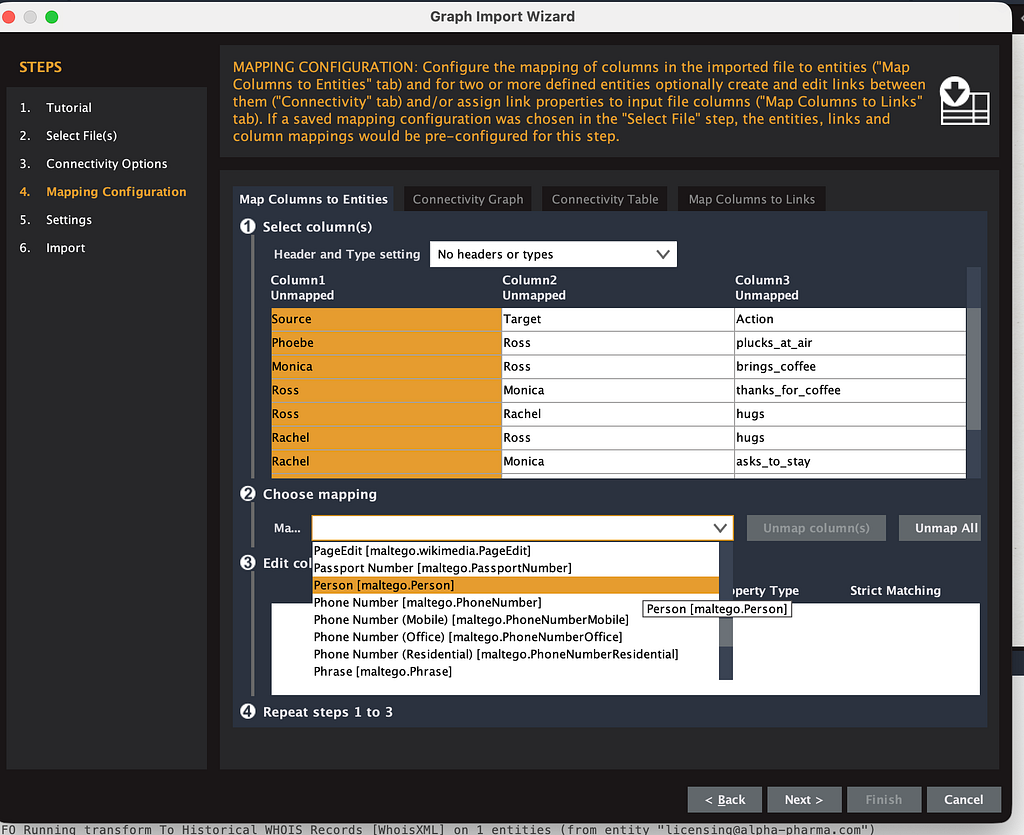
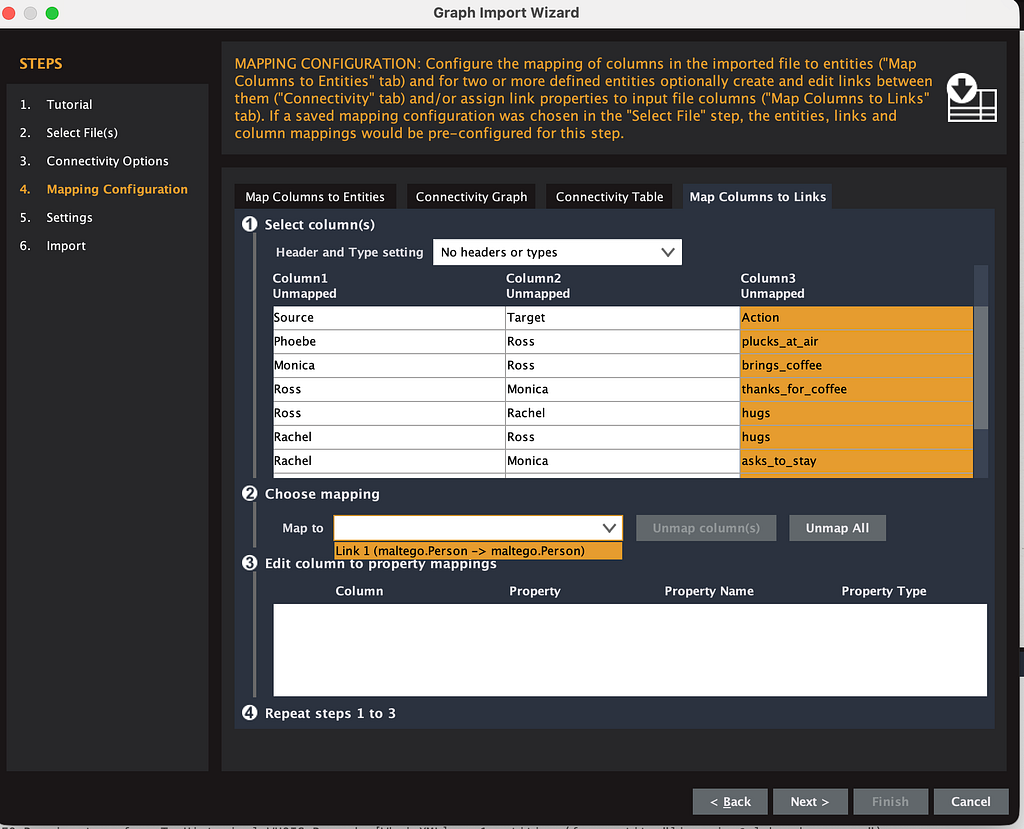
Don’t click Next yet. Go to the “Map columns to links” tab in the upper right.
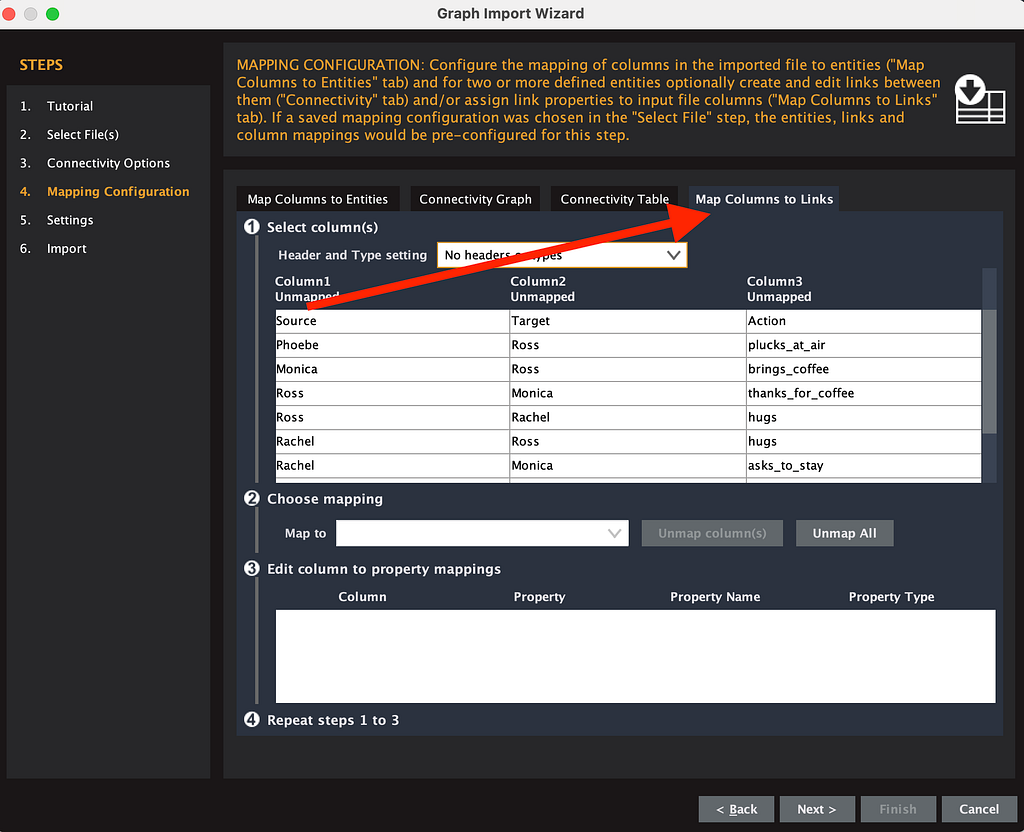
This is where you map column 3 (your action) as the link between column 1 and column 2. You choose your column 3 and then map it to number 1 person. This means that your source, your person that is in your column 1, is related to your target as column 3.
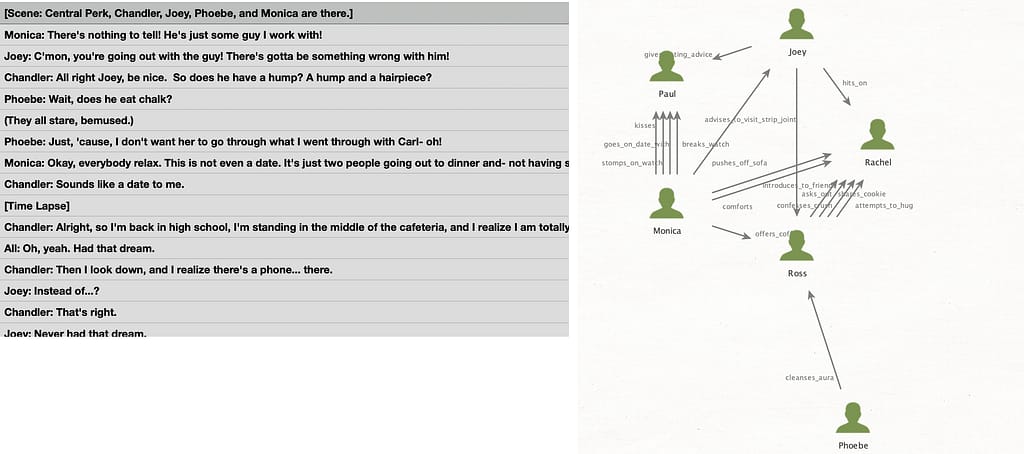
Step 5: The Graph
Once imported, you get a proper Maltego graph with entities as nodes, relationships as labeled edges.
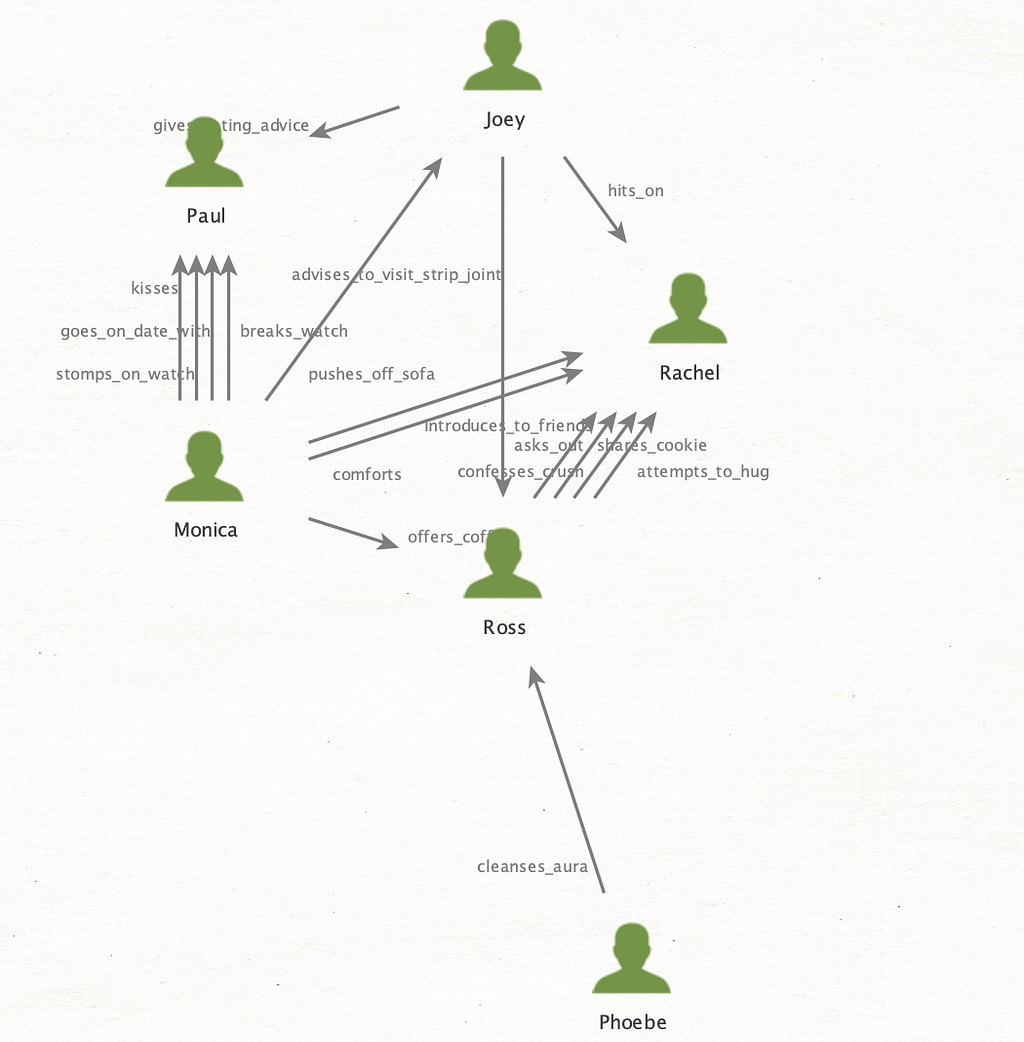
What makes this immediately useful is that you can:
- Run further transforms on the entities (look up a person, enrich a location)
- Filter by relationship type
- Apply Maltego’s built-in layout algorithms to spot clusters and central nodes
- Cross-reference entities against your other Maltego data sources
Three rules I keep coming back to
Before you run this on your own dataset, there are three simple rules. None of them are about Maltego or Google AI Studio specifically. They are about how to think when an AI is doing the reading for you, and they are the difference between a graph that holds up under scrutiny and one that quietly invents the parts it could not extract.
1. Define the relationship as observable action, not interpretation. The closer your relationship definition stays to what is visible in the text, the more you can trust the output. The moment you ask the model to interpret meaning, you import its assumptions, invisibly, into your analysis.
2. Choose your test dataset for verifiability, not novelty. If you cannot check whether the AI got it right on a dataset you already know, you have no way of knowing whether to trust the workflow when the stakes are real.
3. Validate before you scale. Run a few pages, compare outputs across runs, fix the schema, then build the pipeline. Trusting a one-shot result on a 200-page document is how you publish wrong.
Turn any document into a Maltego graph was originally published in OSINT Team on Medium, where people are continuing the conversation by highlighting and responding to this story.